

You have a fantastic photo, but the website you are trying to upload it to keeps rejecting it. Perhaps Instagram is cutting off the edges of your landscape shot, LinkedIn says your banner is the wrong shape, or a government portal is demanding an exact 600x600 pixel square.
Getting an image to fit a specific digital box can be incredibly frustrating. Most default phone gallery apps only offer basic cropping, but they do not let you type in the exact pixel width and height you need. To solve this, many people turn to online image editors, which are often slow, filled with ads, and require you to upload your personal photos to their cloud servers.
In this tutorial, we will show you how to resize and crop your images to exact, pixel-perfect dimensions directly in your web browser, without sacrificing the quality of your photo or your privacy.
Why You Shouldn't Use Cloud Image Resizers
When you search for an "online image resizer," almost every result operates on the cloud. This means when you want to crop a selfie or resize a family photo for a visa application, you are forced to upload that image to a remote server.
This presents two major problems. First, there is the privacy risk. Once your photo is uploaded, you lose control over it. It could be stored, analyzed, or leaked. When dealing with photos intended for official government portals, privacy should be your top priority.
Second, there is the issue of speed and quality. Uploading a high-resolution 10MB photo from your phone, waiting for the server to process it, and downloading it again takes time. Furthermore, many of these free services will secretly compress your image to save their own server bandwidth, returning a blurry, low-quality picture.
The Bramhify Solution: Private and Pixel-Precise
Bramhify's Image Resizer & Cropper solves all these problems by running entirely on your own device.
When you open our tool, the web code loads into your browser, and your phone or computer's processor does all the heavy lifting. Your photo is never uploaded to the internet. This guarantees 100% privacy, instant processing times, and ensures that you remain in complete control of your image's quality.
Start Resizing Your Image Here:

Step-by-Step Guide for Common Scenarios
Our tool handles both cropping (cutting away the edges) and resizing (shrinking or enlarging the whole image). Here is how to use it for the most common requirements.
Step 1: Open the Resizer and Upload
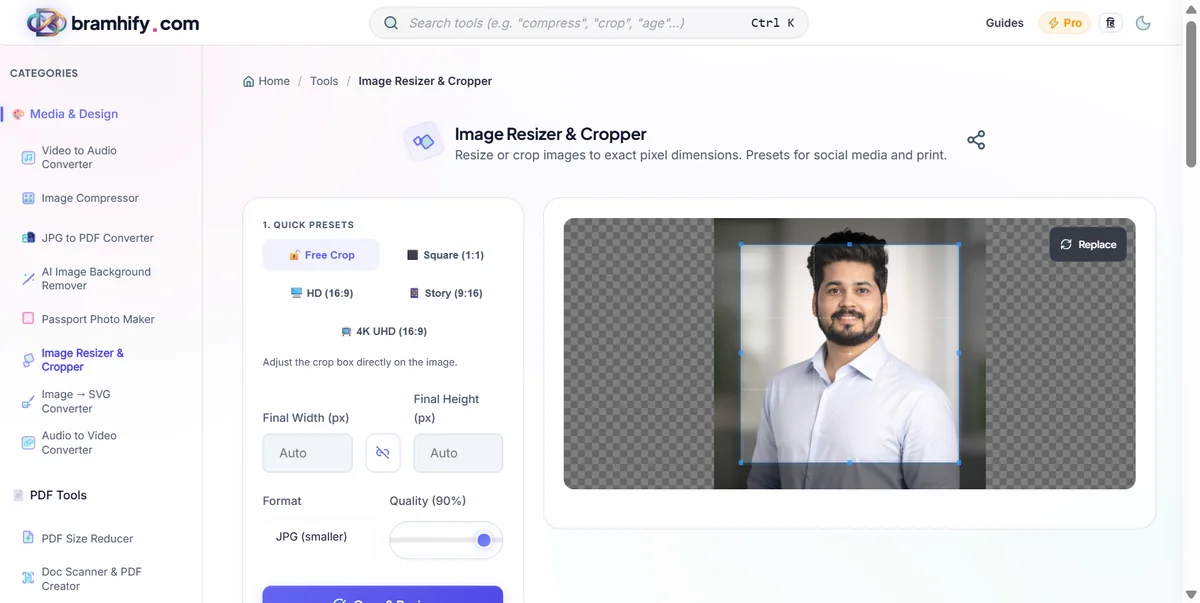
Tap the tool card above to launch the Bramhify Image Resizer. Look for the upload box in the center of the screen and select the photo from your device.
Step 2: Choose Your Dimensions or Aspect Ratio
The tool provides two ways to adjust your image depending on your needs.
Scenario A: Social Media (Instagram, LinkedIn, YouTube) If you are posting to social media, you usually need a specific "aspect ratio" (the shape of the image).
- Use the 1:1 Square preset for Instagram posts.
- Use the 9:16 Portrait preset for Instagram Stories and Reels.
- Use the 16:9 Landscape preset for YouTube thumbnails. Tap the preset button, and a crop box will appear over your image. You can drag this box around to frame exactly what you want to keep.
Scenario B: Government and Official Portals If you are applying for a visa or a government exam (like UPSC or SSC), the portal will demand exact pixel dimensions, such as "600x600 pixels." In the sidebar of the tool, locate the "Width" and "Height" text boxes. Delete the current numbers and type in the exact numbers required by the portal. The tool will mathematically scale your image to fit those exact dimensions.
Step 3: Apply the Changes
Once you have set your crop box or typed in your exact pixel dimensions, tap the "Apply Changes" button. Because the processing happens locally on your device's processor, it will execute instantly.
Step 4: Download Your Perfect Image
Your newly resized image will appear on the screen. Tap the download button to save it directly to your device. It is now perfectly sized and ready to be uploaded to your target website, completely error-free.
Further Optimizations for Your Photos
If the website accepted your new dimensions but rejected the file because it is too heavy (e.g., "File must be under 100KB"), you will need to compress it. You can safely reduce the file size by using our guide on how to compress images without losing quality.
Alternatively, if you are specifically trying to create an official 4x6 print grid of passport photos for a physical application, you should use our dedicated free passport photo maker tool instead.